
Unleash Your Inner Diva: Step-by-Step Wig Customization Guide
Wigs are more than just a fashion statement; they’re a way to express your unique style and personality. For Black women who wear wigs regularly, customization is key to achieving that perfect look. Whether you’re looking for a natural finish, a bold color change, or a flawless fit, this guide will walk you through everything you need to know about customizing your wig. Get ready to transform your wig into something that feels like it was made just for you!
Why Customizing is Important
Customizing your wig is crucial because it allows you to create a look that is uniquely yours. Off-the-shelf wigs can sometimes look generic, but with a few tweaks, you can transform your wig into a masterpiece. Plus, a customized wig fits better, feels more comfortable, and looks more realistic. For Black women who wear wigs regularly, customization is the key to achieving that flawless, undetectable finish.
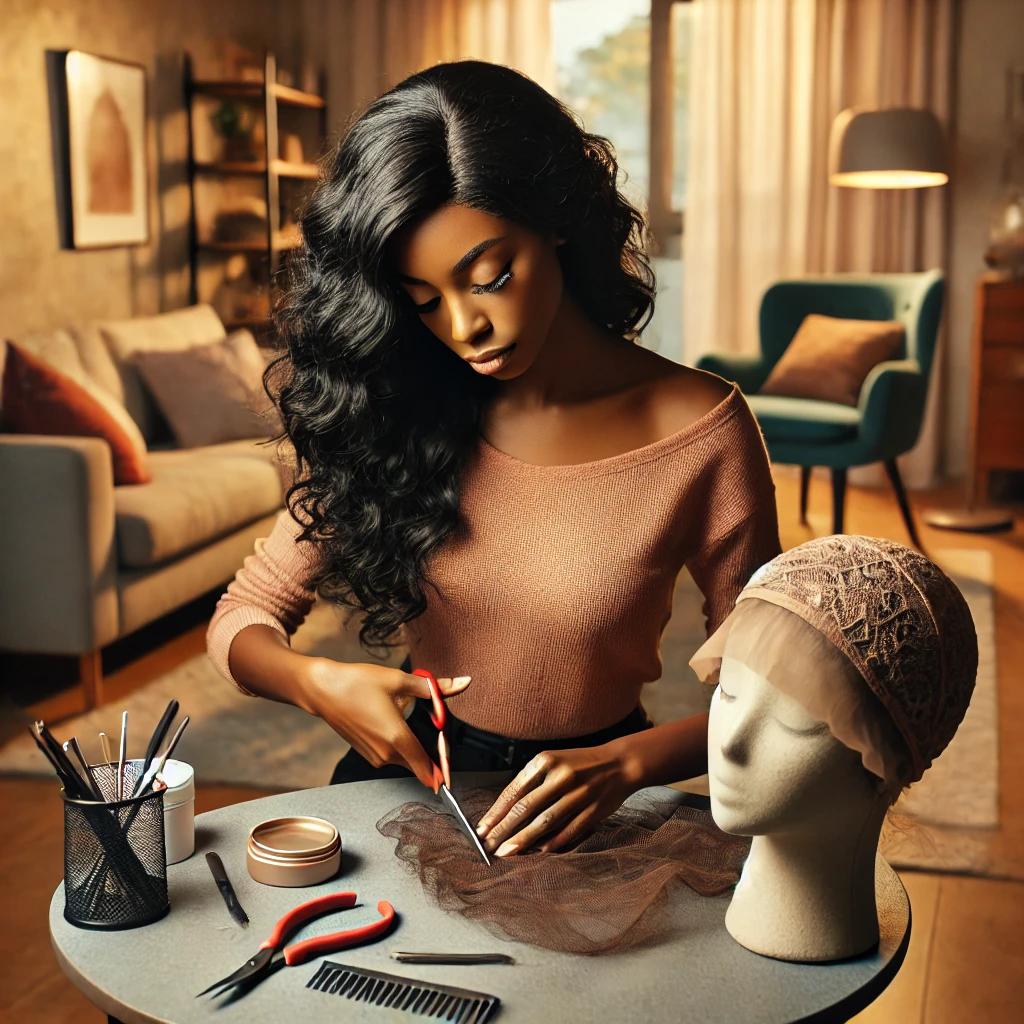
The Essentials You Need to Customize Your Wig
Before we get into the step-by-step process, let’s gather the tools and products you’ll need:
- Wig Head and Stand: A wig head helps you see the shape and style of your wig as you work on it.
- Wig Clips and T-Pins: These hold your wig in place while you customize it.
- Rat-Tail Comb: Essential for parting and sectioning the hair.
- Tweezers: For plucking the hairline and part.
- Hair Shears: Sharp scissors for trimming and shaping.
- Hair Dye or Tint Spray: For coloring or toning the wig.
- Heat Tools: A flat iron or curling iron for styling.
- Hair Products: Mousse, holding spray, and styling gel to finish the look.
Step 1: Prepping Your Wig for Customization
Wash and Condition the Wig
Before starting any customization, always wash and condition your wig. This removes any factory chemicals and makes the hair more manageable. Use a sulfate-free shampoo and a moisturizing conditioner to keep the hair soft and shiny.
- Gently Detangle: Start by detangling the wig with a wide-tooth comb, working from the ends to the roots.
- Wash: Rinse the wig with lukewarm water, apply shampoo, and massage gently. Avoid scrubbing, as this can cause tangling.
- Condition: Apply conditioner and let it sit for a few minutes. Rinse thoroughly with cool water to seal the cuticles.
- Dry: Pat the wig dry with a towel and let it air dry on a wig stand. Avoid using a blow dryer, as heat can damage the hair.
Adjust the Wig Cap Size
A well-fitted wig cap is essential for comfort and security. If the wig feels too tight or too loose, adjust the straps or add an elastic band to customize the fit.
- Measure Your Head: Use a measuring tape to determine the circumference of your head.
- Adjust the Straps: Most wigs come with adjustable straps at the back. Tighten or loosen them according to your measurements.
- Add an Elastic Band: For a more secure fit, sew an elastic band from ear to ear inside the wig cap. This is especially helpful for lace front wigs.
Step 2: Customizing the Hairline
Pluck the Hairline for a Natural Look
The hairline is the most important part of a wig when it comes to achieving a natural look. Most wigs come with a dense hairline that looks unnatural, so plucking is necessary.
- Set Up Your Wig: Place your wig on the wig head and secure it with T-pins.
- Section the Hair: Part the hair at the front, leaving a small section at the hairline.
- Start Plucking: Using tweezers, gently pluck the hairline to create a gradient effect. Focus on thinning out the hair, especially around the temples. Be careful not to overpluck, as this can create bald spots.
- Check Your Work: Step back and look at the hairline from different angles to ensure it looks natural.
Cut the Lace
Cutting the lace is a delicate process that requires precision. This step is crucial for achieving an undetectable hairline.
- Secure the Wig: Make sure your wig is securely fastened to the wig head.
- Trim the Lace: Using sharp hair shears, carefully cut the lace along the hairline. Leave about a quarter-inch of lace to help blend the wig with your skin.
- Customize the Lace: If needed, you can tint the lace using foundation or lace tint spray to match your skin tone.
Step 3: Styling Your Wig
Create Baby Hairs
Baby hairs add a natural touch to your wig, making it look like the hair is growing directly from your scalp.
- Section the Baby Hairs: Pull out a small section of hair at the hairline where you want the baby hairs.
- Trim the Hair: Using hair shears, trim the hair to your desired length. Baby hairs are usually about 1-2 inches long.
- Style the Baby Hairs: Apply a small amount of styling gel to the baby hairs and use a rat-tail comb to shape them. You can create swoops or curls, depending on your preference.
Part the Wig
A defined part can make your wig look more realistic. You can choose a middle, side, or even a zigzag part.
- Choose Your Part: Decide where you want the part to be. Use a rat-tail comb to create a clean, straight line.
- Pluck the Part: To make the part look more natural, gently pluck a few hairs along the parting line. This will create the illusion of a scalp.
- Set the Part: Apply some mousse or holding spray along the part to keep it in place.
Style with Heat Tools
Now that your wig is customized, it’s time to style it! Whether you want sleek straight hair or bouncy curls, heat tools are your best friend.
- Heat Protection: Always apply a heat protectant spray before using any heat tools on your wig.
- Straighten or Curl: Use a flat iron for a sleek, straight look or a curling iron for waves or curls. Work in small sections for the best results.
- Finish with Products: Use a lightweight serum or shine spray to add gloss and reduce frizz. A holding spray can help keep your style in place all day.
Step 4: Coloring Your Wig
Choose Your Color
If you want to add some color to your wig, now’s the time! Whether you’re going for a bold change or subtle highlights, choosing the right color is key.
- Select a Dye: Choose a hair dye suitable for synthetic or human hair, depending on your wig type. Human hair wigs can be dyed just like natural hair, while synthetic wigs require special dye.
- Test a Strand: Before dyeing the entire wig, do a strand test to see how the color turns out.
- Dye the Wig: Apply the dye evenly, following the instructions on the package. Use a brush for precision and ensure the color is distributed throughout the wig.
Rinse and Condition
After dyeing, it’s crucial to rinse and condition the wig to keep the hair soft and healthy.
- Rinse Thoroughly: Rinse the wig with lukewarm water until the water runs clear.
- Condition: Apply a deep conditioner and let it sit for about 10-15 minutes. Rinse with cool water to lock in moisture.
- Dry: Pat the wig dry with a towel and let it air dry on a wig stand.
Step 5: Maintaining Your Customized Wig
Regular Care Routine
Maintaining your wig is essential to keep it looking fresh and fabulous. A regular care routine will ensure your wig lasts longer and stays in great condition.
- Washing: Wash your wig every 8-10 wears or when it starts to look dull or dirty. Always use sulfate-free products.
- Detangling: Detangle your wig regularly with a wide-tooth comb to prevent knots and tangles.
- Storage: Store your wig on a wig stand or in a satin bag when not in use. This helps maintain its shape and prevent tangling.
Reviving Your Wig
Over time, your wig may start to lose its luster. Here’s how to revive it:
- Deep Conditioning: Give your wig a deep conditioning treatment once a month to keep the hair soft and hydrated.
- Trim the Ends: If the ends start to look frayed or split, trim them with hair shears to refresh the look.
- Restyle: Use heat tools to restyle your wig and bring it back to life. Just remember to use heat protection!
Embrace Your Customized Wig
Customizing your wig is a fun and empowering process that allows you to create a look that is truly your own. With the right tools, products, and techniques, you can achieve a flawless, natural-looking wig that enhances your beauty and boosts your confidence.


 No products in the cart.